.svg)
Get started with Rukkor
This guide walks you through everything you need to get up and running — from creating your Space and inviting your team, to setting up channels, organizing your files, and meeting Wingman. Follow the steps below and you'll be collaborating in no time.
Step 1: Create your Space
Your Space is the hub for your team, organization, or community. Start by giving it a name and personalizing it with a profile photo and banner. Choose whether to use your real name or an alias.
Once your Space is created, head to Space Settings to set up roles and permissions — this controls who can see and do what inside your Space.
Step 2: Invite your colleagues
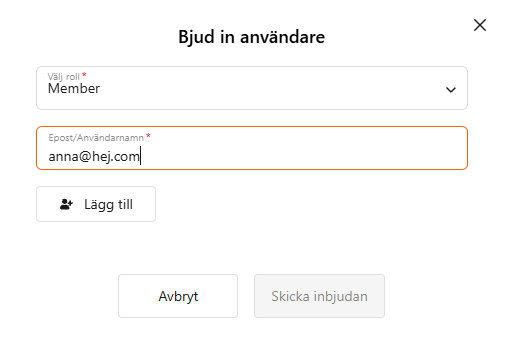
Add your team members and assign them the right roles straight away. Here's how:
- Click on your Space.
- Click "Invite users."
- Search for their username or email address.
- Click "Send invitation."
The invitation is sent via email or directly in the Rukkor app.

Step 3: Add your contacts
Contacts are different from Space members. A contact is anyone you want to communicate with — inside or outside a Space — without them being a formal member. This is useful for external collaborators, clients, or partners.
Here's how to add a contact:
- Click on Messages.
- Enter the email address of the person you want to add.

Step 4: Set up your channels
Channels are where your team's work happens. Create channels for topics, teams, departments, or projects so everyone always knows where conversations and materials belong.
Within each channel you can chat, hold video meetings, manage tasks, and keep work organized with threads — focused discussions around a specific topic or task.
💡 Tip: Use public channels for general team access and private channels for restricted conversations.
Step 5: Organise your Drive
Upload your files and documents to Drive — your team's shared file storage. Everything stays in one place and is accessible to the right people.
💡 Tip: Build a clean folder structure from day one. It takes five minutes now and saves hours later.
Step 6: Create your first Board
Boards are where you plan and track work visually. Set up a board to manage to-do lists, track projects, handle customer information, or map out any workflow — your way.
A board is made up of collections with custom fields like dates, assignees, and attachments. View your work as a Table, Board, Calendar, or Gantt chart depending on what you need.
💡 Tip: Not sure where to start? Save a Board as a template once you've built something you like — and reuse it for future projects.
Step 7: Meet Wingman, your AI assistant
Wingman is Rukkor's built-in AI assistant. Go to Wingman in the left menu and grant it access to the channels, boards, and files you want it to work with.
Once set up, Wingman can:
- Summarise documents and meeting transcripts
- Suggest smart replies in chats
- Answer questions about your files and boards
- Improve search across your messages and files
The more you use Rukkor, the more useful Wingman becomes.
.svg)