.svg)
Export and print
Once your project is complete, Geometra gives you several options for sharing and presenting your data. In this article, you'll learn how to export your bill of quantities and what printing options are available.
Where to export from
You can export data from your projects either via copy-paste or to a CSV file. There are two places in the program you can export from:
Drive – Export data quickly from previewed files. This exports all available data in the file; you cannot select specific items to include.
Estimate – Make precise selections and subtotals before exporting. Choose what to include from the estimate tree and among your rows, then use one of the export options to extract exactly the information you need.
Export to clipboard and paste into Excel
Exporting to the clipboard lets you paste data from Geometra directly into any other program. It works best with spreadsheet applications such as Microsoft Excel and Google Sheets, but is also compatible with Numbers, OpenOffice Calc, and others.
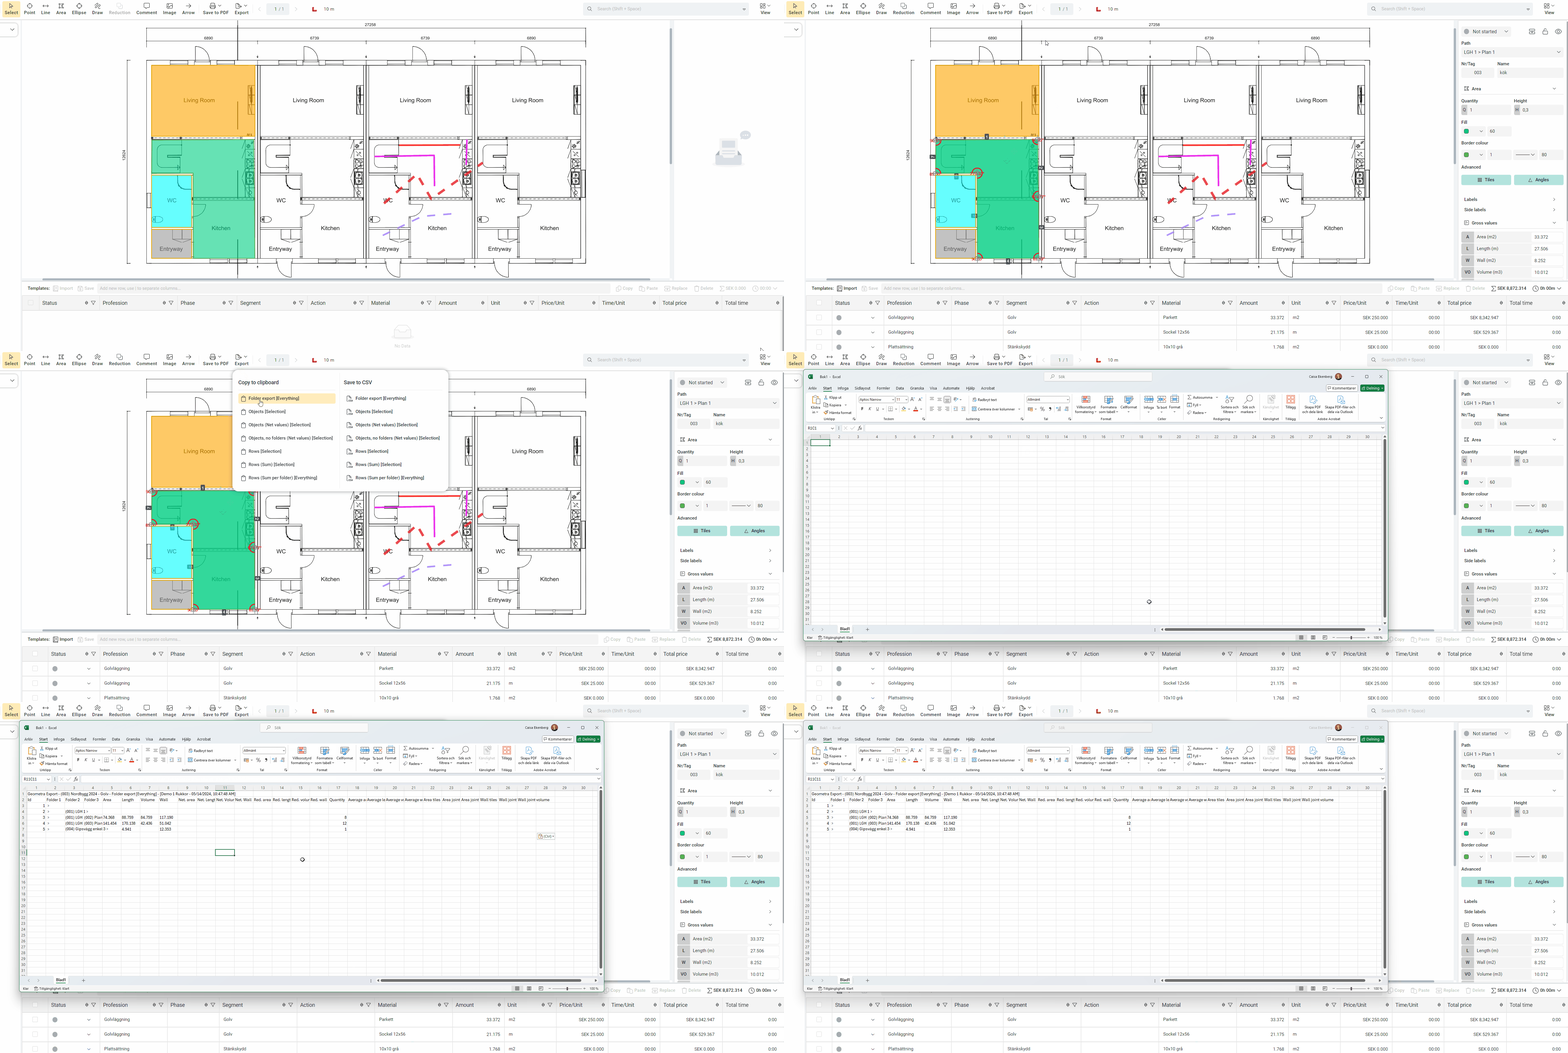
Export to CSV and open in Excel
CSV (Comma-Separated Values) extracts your data from Geometra in a comma-separated format. Depending on the language settings of your operating system, browser, or Geometra, the delimiter may be a comma or a semicolon — both are valid within the CSV standard. If the file doesn't open correctly in Excel, check which delimiter your system expects.

Export your template rows to CSV
You can export your template rows to a CSV file, open and edit the contents in Excel or a similar application, and then re-upload the file. Geometra will apply the updates to the matching rows automatically.
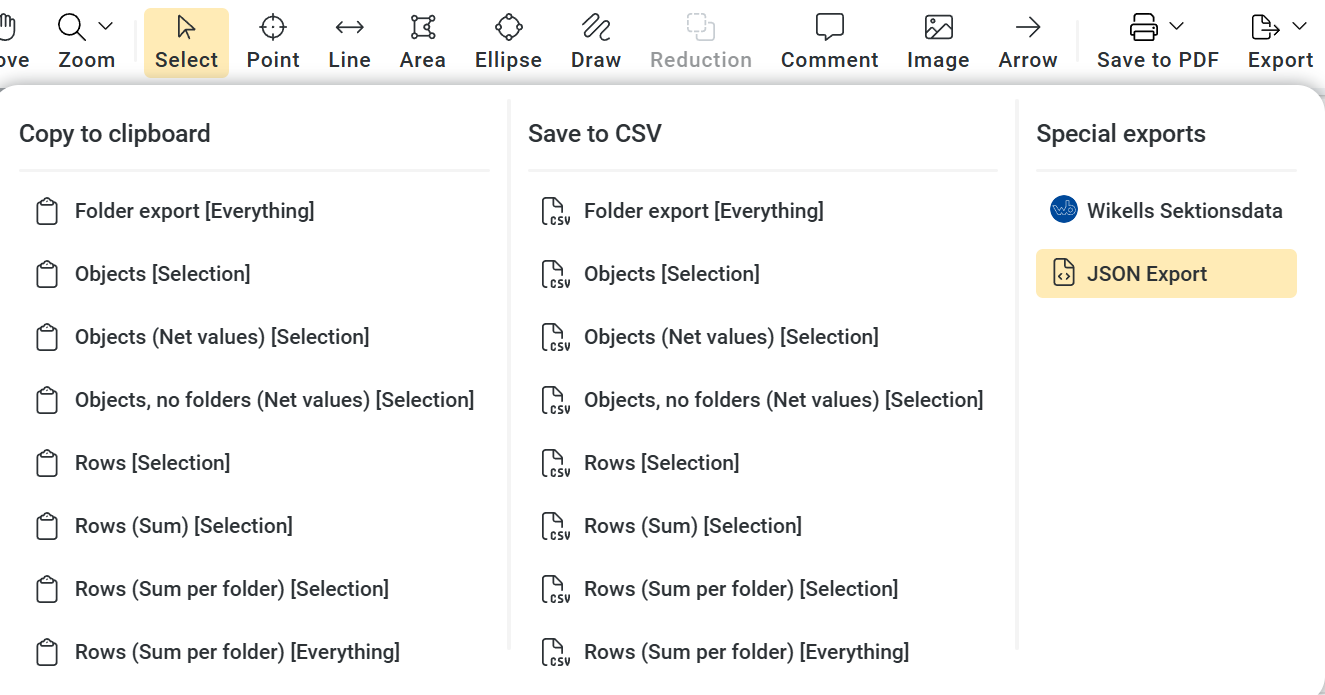
Export types
Geometra offers several preset export formats to suit different needs:
Folder Export – A summary of all measurements per folder. One of the most commonly used export options.
Objects – Detailed information about each measurement, including all values. One of the most commonly used export options.
Net Object – The same as Objects, but exports net values only.
Object, no folders – All measurements without the folder structure.
Rows – All rows present in each measurement. A detailed export with information about each object.
Rows Sum – All identical rows are consolidated into a single line. One of the most commonly used export options.
Rows Sum per folder – Rows summarised per folder level, giving you subtotals that follow your folder structure.
Export to Wikells Sektionsdata
Geometra can export data directly to Wikells Sektionsdata.
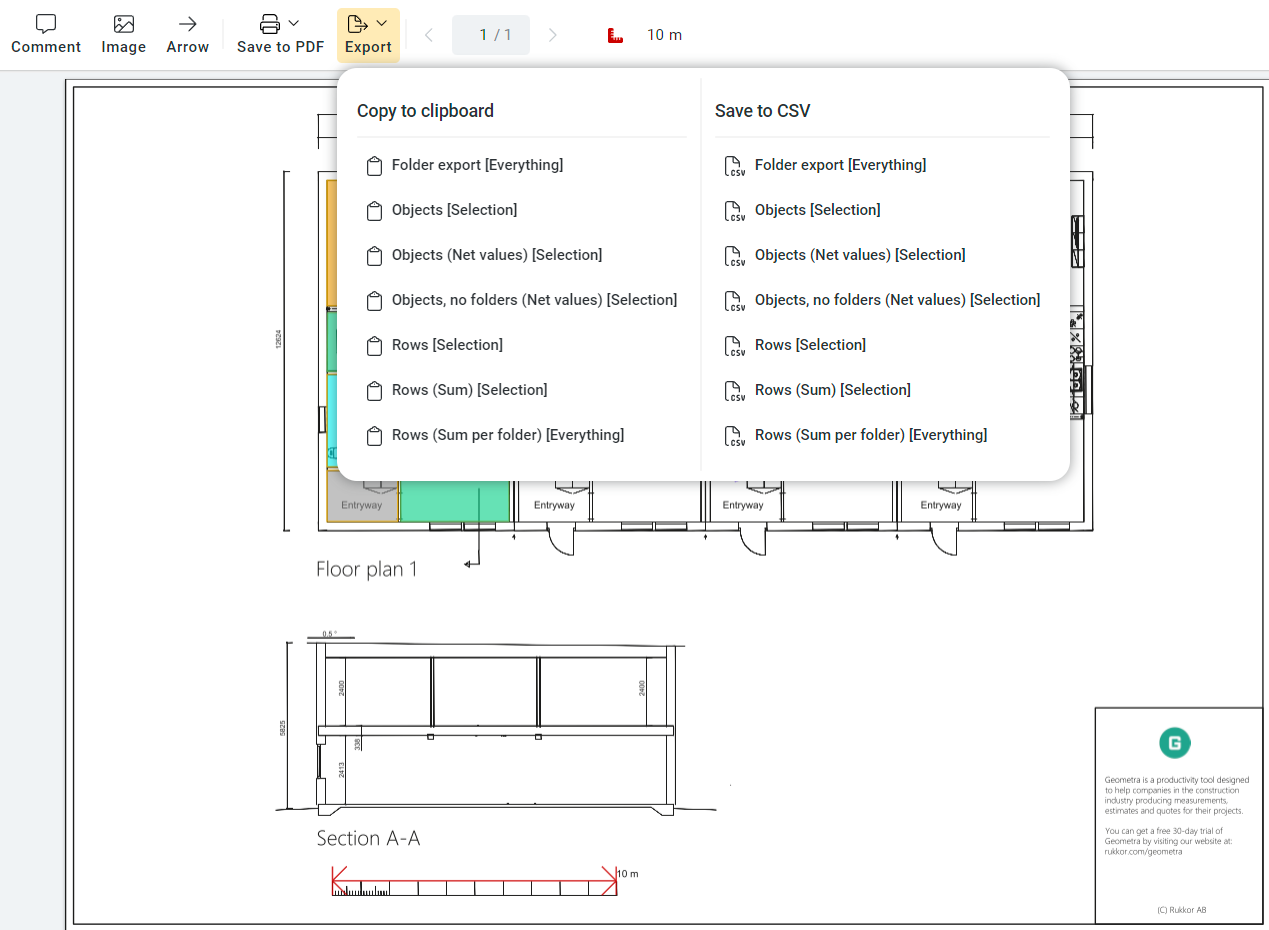
Go to Settings > General and select Wikells Sektionsdata as your estimation tool. Once enabled, sections of the interface will be marked with the Wikells logo, clearly indicating which fields need to be filled in for the export to work correctly.
Also check Settings > Rows — a new column called "Chapter" will have been added, allowing you to match entries with the Chapter column in Wikells. Fill in the fields marked with the Wikells logo.
When ready, go to Export > Special Exports > Wikells Sektionsdata. Geometra generates an XML file that can be imported directly into Wikells. You can use the default chapters (1–17) or build your own calculation tree in Sektionsdata using all 999 chapters.
Export to EG SmartKalk
Geometra can export data directly to EG SmartKalk.
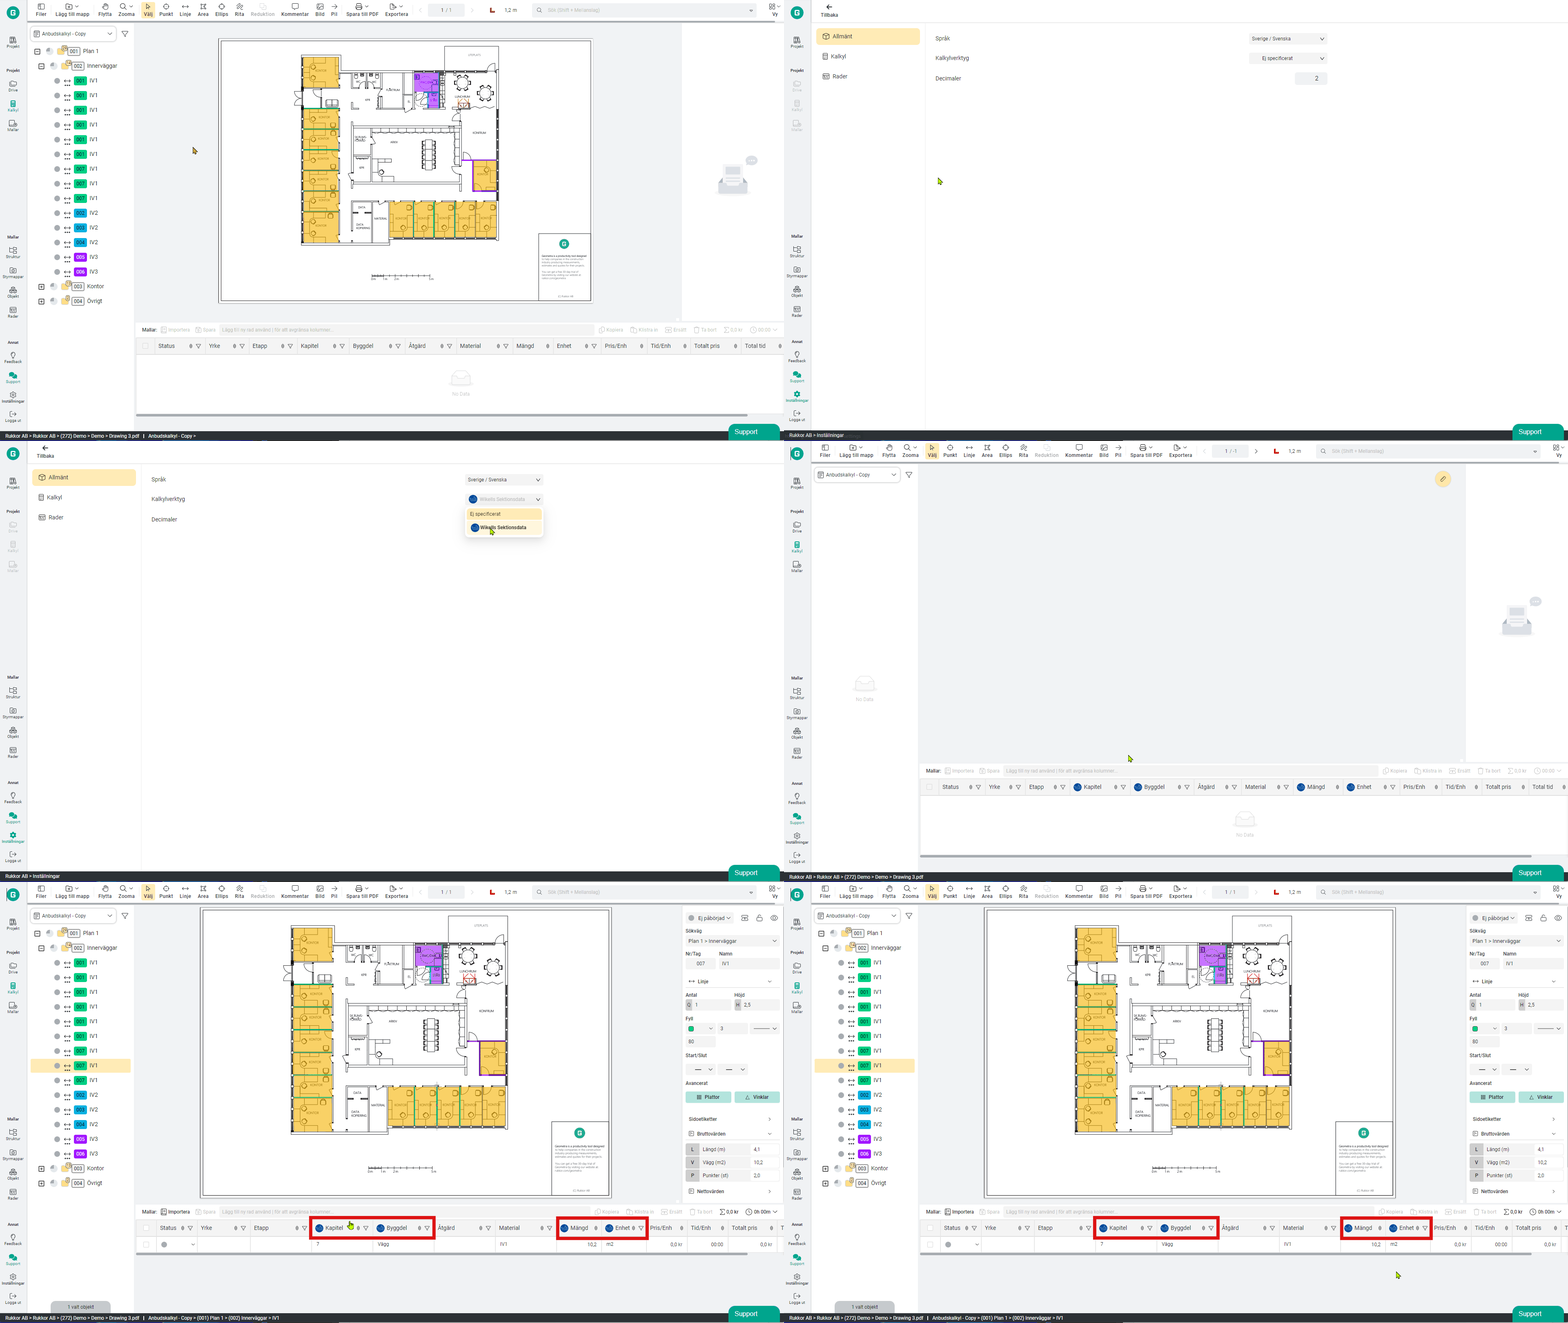
Export from Geometra:
- Go to Settings in the main menu.
- Click General and select EG SmartKalk under Calculation Tools.
- Click "Yes" in the dialogue box to update your rows with the selected option.
- Return to your project by clicking the Back button.
- The EG SmartKalk logo now appears in your rows.
- Complete your measurements and select the quantities and folders you want to export, along with all rows to be included.
- Choose Export and then EG SmartKalk.
- A JSON file will be downloaded, ready to import into SmartKalk.
Import to EG SmartKalk:
- Open SmartKalk.
- Navigate to the quantity field where you want to import your data.
- Use the shortcut Ctrl+Shift+Q to retrieve quantities from Geometra. Alternatively, right-click the name and go to Quantity Helper > Retrieve quantity from Geometra file.
- Click Select File > Import File, then choose the file downloaded from Geometra.
- A preview window will appear showing the imported data.
- Select the rows you want to add to your calculation and click OK.
- Done!
Export to JSON
You can export your entire calculation — including all objects, their values, and rows — in a structured JSON format. This makes it straightforward to integrate Geometra data into other tools, workflows, or systems.
Select what you want to export, click Export, choose JSON Export, and download the file.
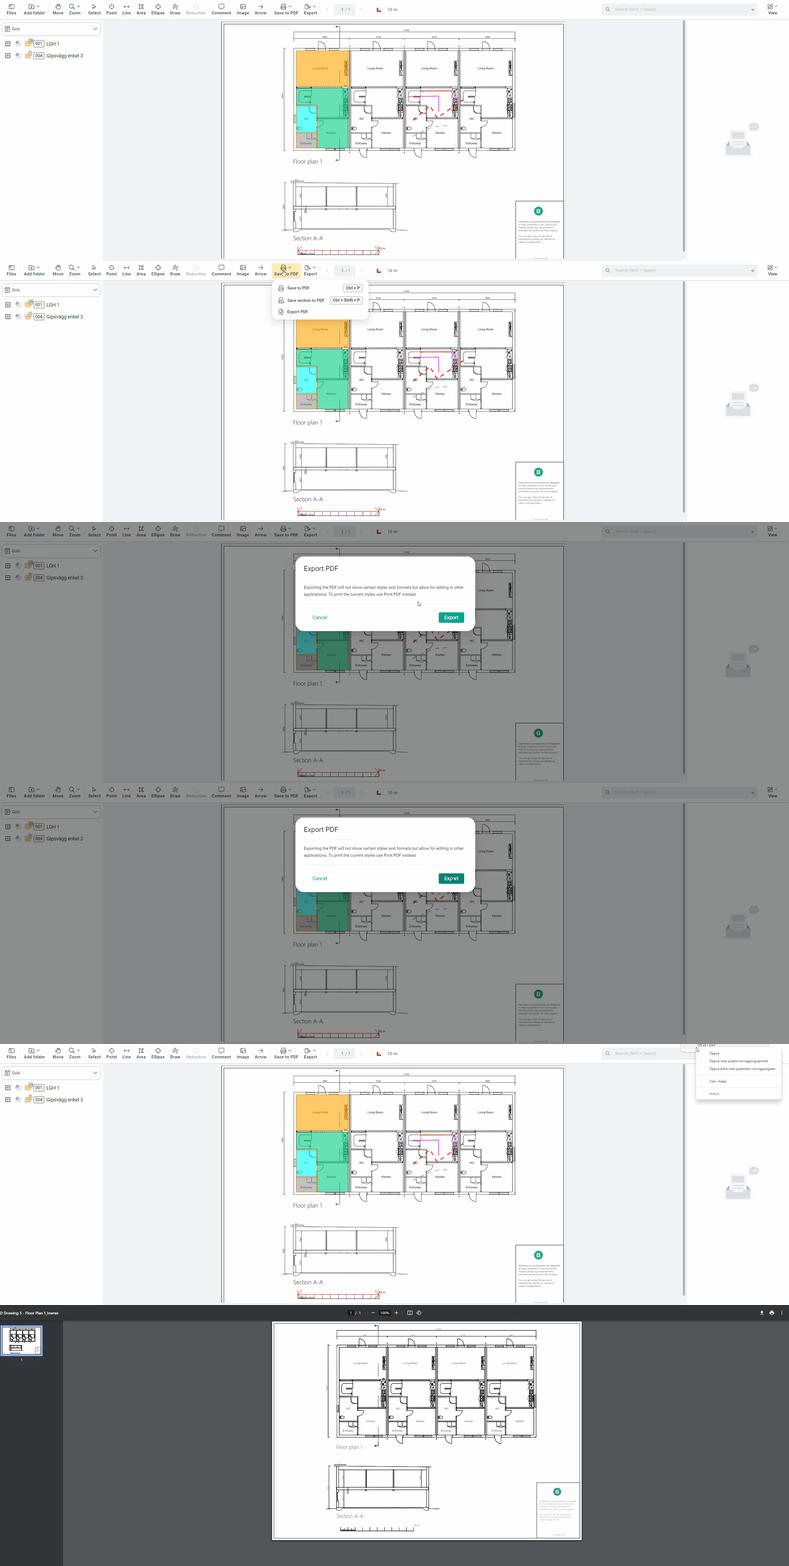
To print in Geometra, first select what you want to include. Geometra then generates a PDF with all visual information, including labels and colour coding. Save the file or send it directly to a printer.

Print Section
Print Section works the same way as Print, but only captures the portion of the file currently visible on screen. This makes it easy to clip a specific area and choose exactly which information to include in the printout.

Export PDF
Exporting as PDF removes certain Geometra-specific visual elements to conform to the standard PDF format, allowing objects to be edited in other PDF tools.
.svg)