.svg)
Quantity takeoff and Markup
Quantity takeoffs are at the heart of what Geometra does. In this article, you'll learn how to use markup tools, perform accurate takeoffs, and describe your bill of quantities in detail.
What is quantity takeoff?
Quantity takeoff is the process of identifying and calculating exactly how much material is needed for a construction project. This includes materials such as concrete, brick, timber, plaster, insulation, and more.
To do this, you measure and determine values such as:
Area – The size of surfaces to be covered by materials, such as floor, wall, or roof areas.
Volume – The amount of a material to be used, such as concrete when pouring a foundation or casting a wall.
Length – The total length of an element on the drawing, which tells you how many material units are needed to cover a given distance or surface. Common examples include timber boards, pipes, cables, and conduits.
Dimensions – The specific measurements of the materials involved, such as the length, width, and height of facade panels.
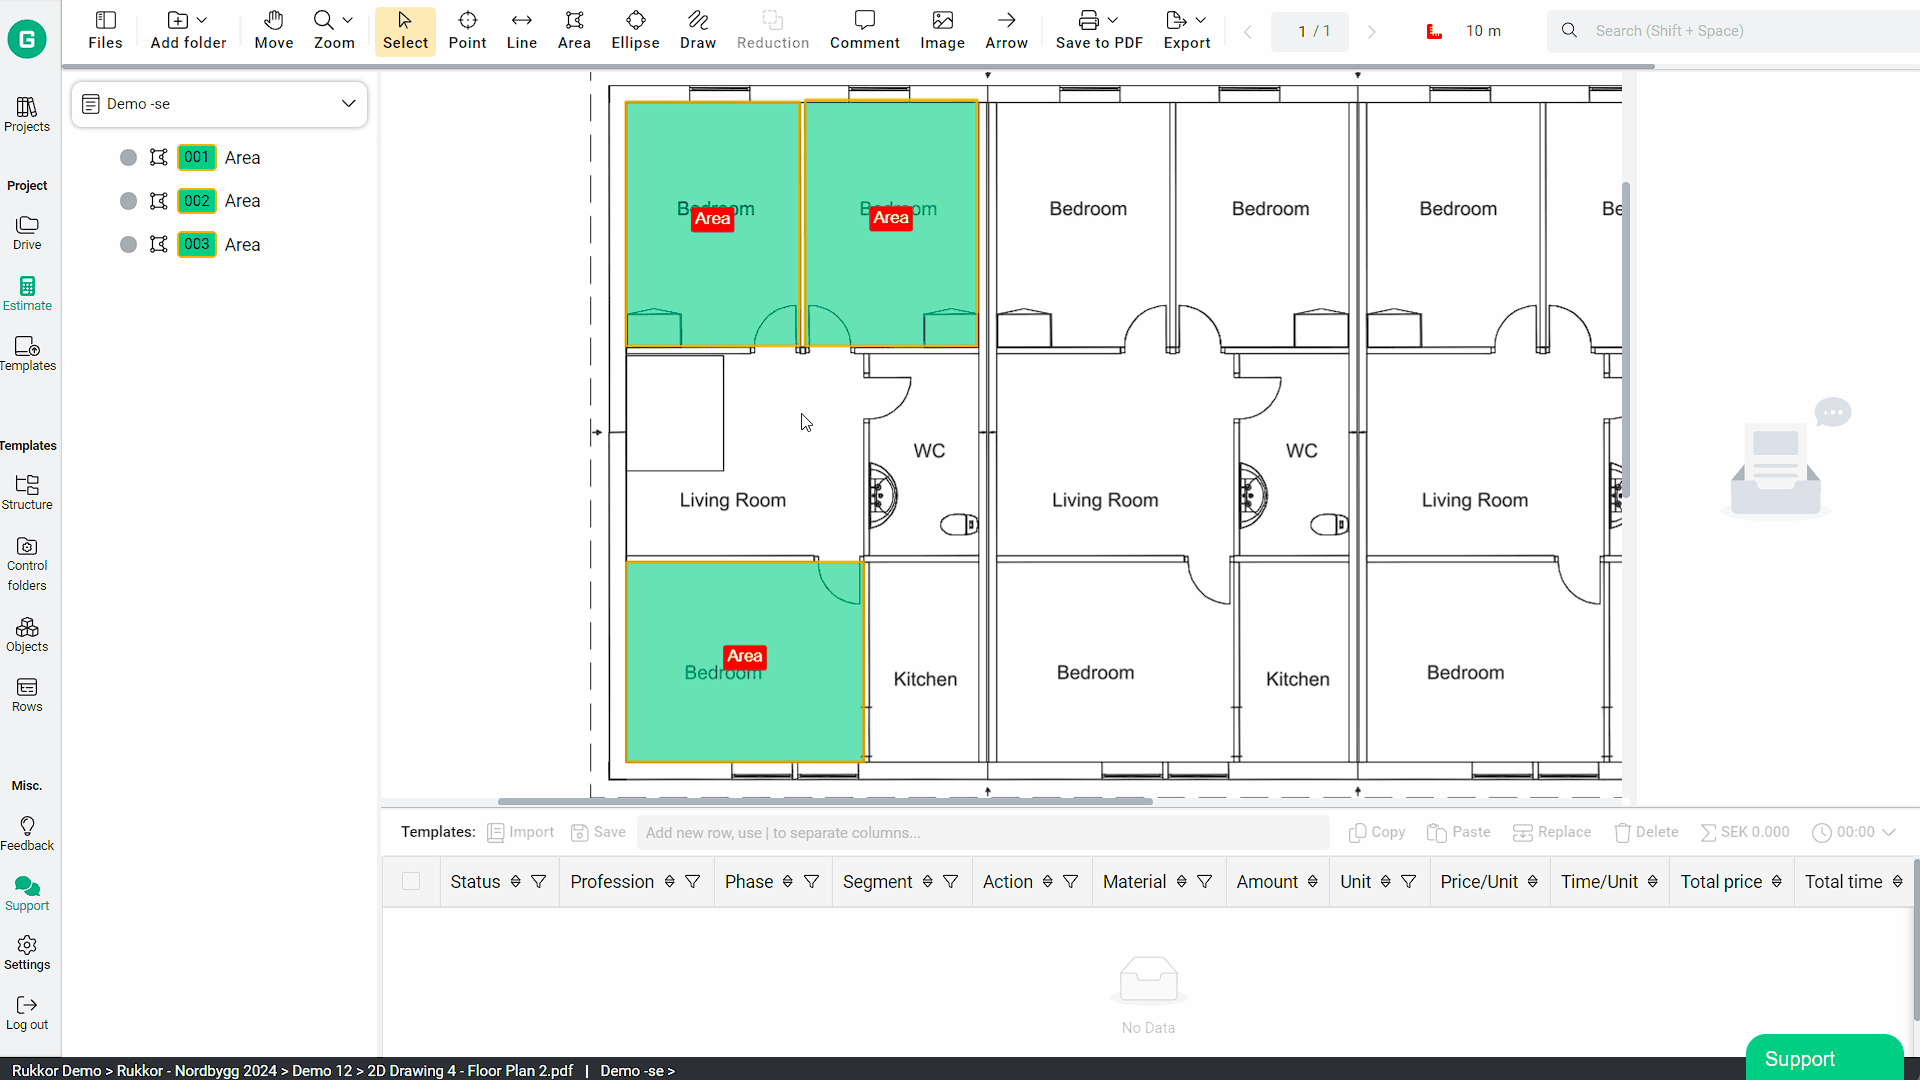
In Geometra, you perform quantity calculations using the tools available in the application. The values you obtain — for example by measuring an area — are collected in the properties panel on the right side of the calculation view.
Markup
Use the markup tools to annotate and comment directly on drawings or documents. Place objects, apply colour, draw arrows, highlight areas, and set accurate scales and heights. Each tool creates an object on the drawing, giving you the measurement values you need to work with in your rows.
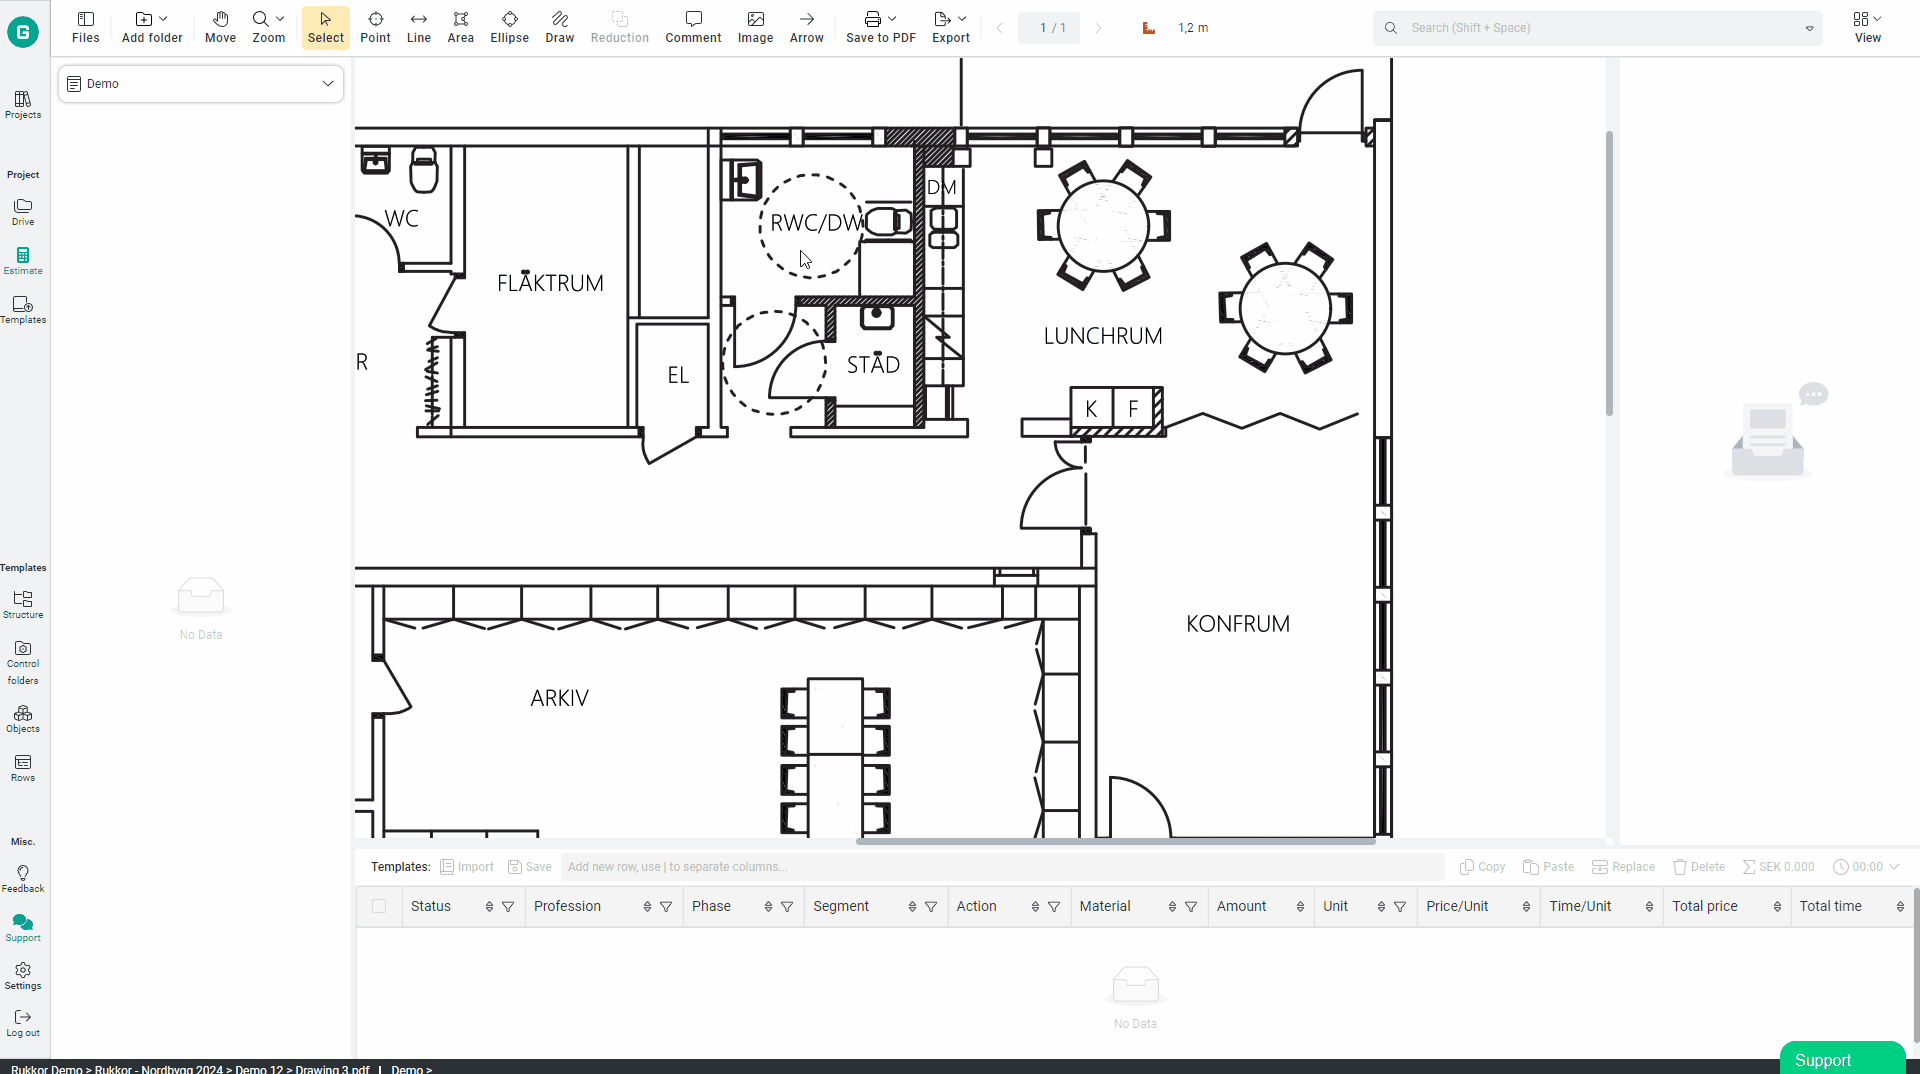
Sort into folders
When you create an object on a drawing, it appears in the estimate tree. Here you can organise your objects into folders. Right-click in the estimate tree and select "Add folder" to create a new one. Name each folder based on its contents — for example, if a set of objects relates only to facades, name the folder "Facades."
We recommend sorting by location, such as building block or apartment. This makes it quick and easy to retrieve subtotals for specific parts of the project.
Read more under the topic Templates.

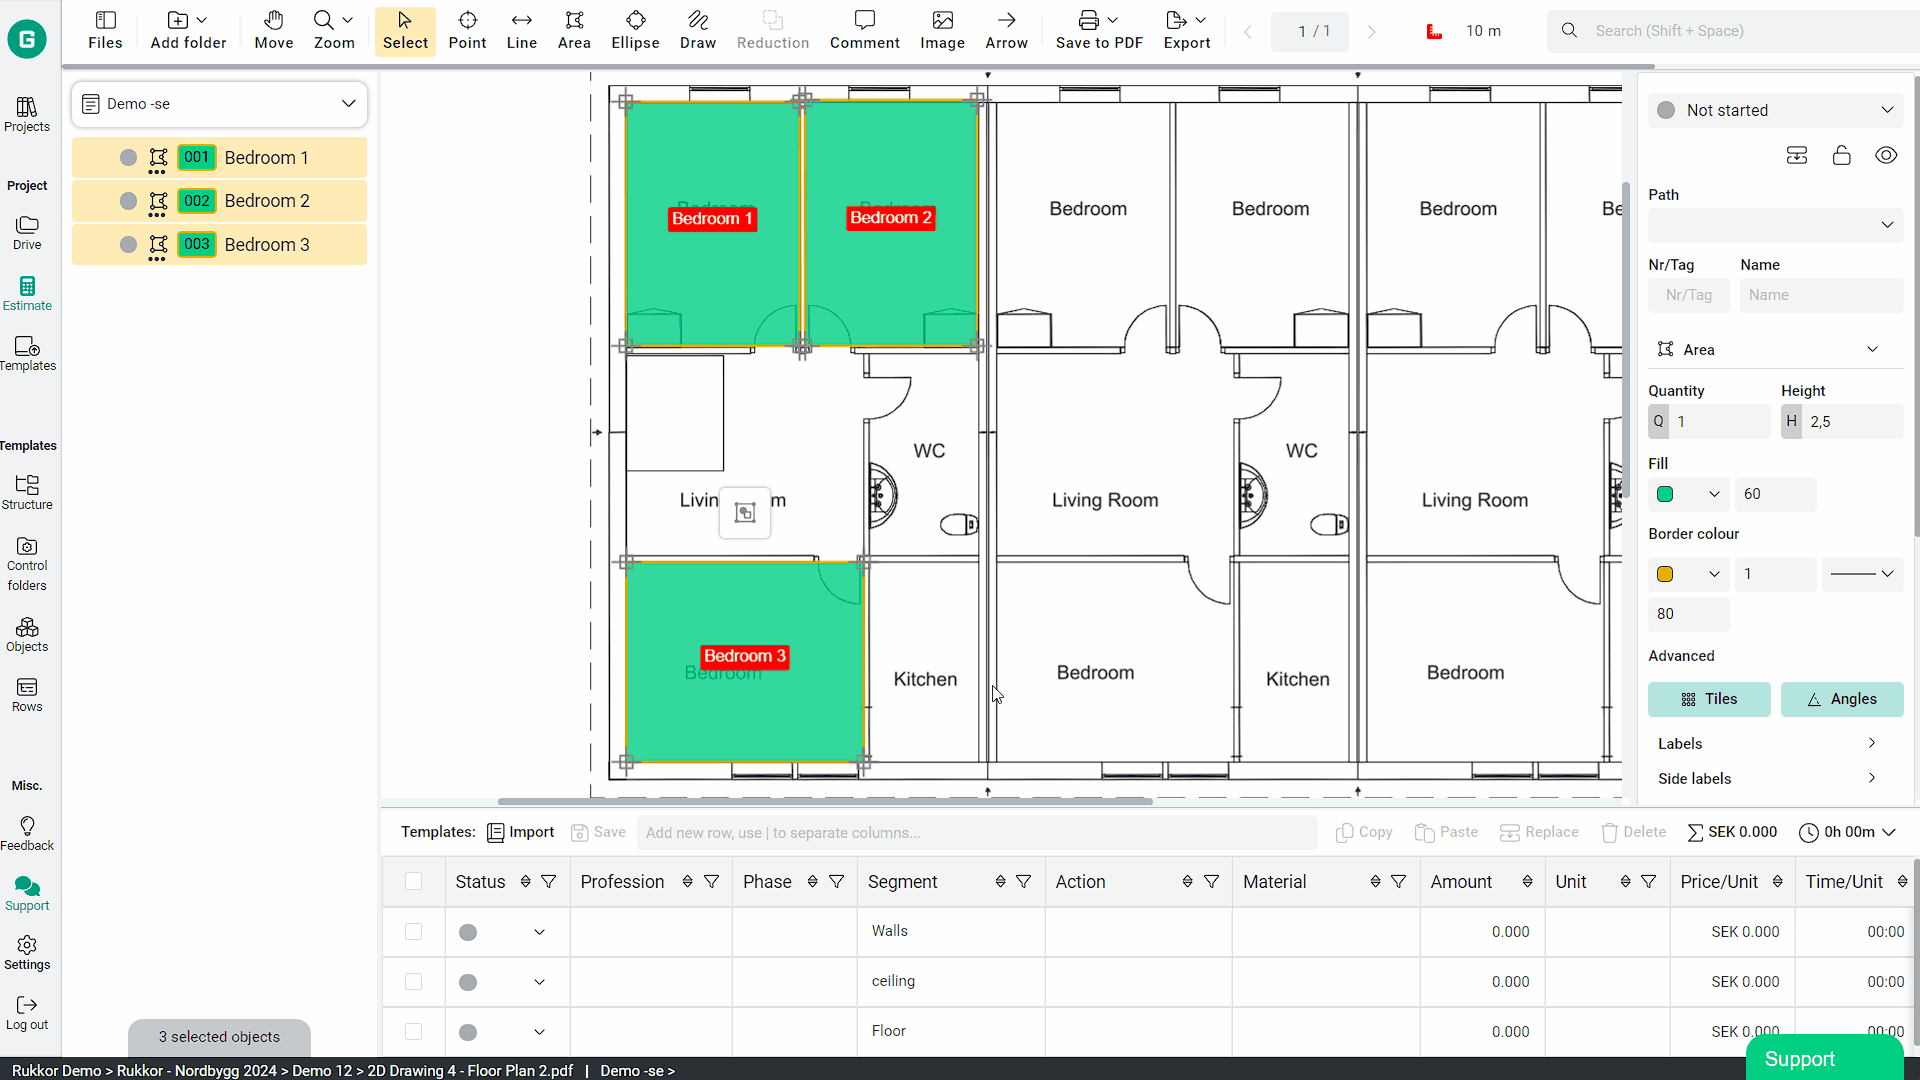
Assign Description and create Quantity takeoff
A placed object without a description represents nothing. Objects only become quantity items once they have been described.
There are two ways to describe quantities: at the row level or at the object level. We recommend using rows, as they allow you to reuse information from a single object to represent multiple different quantity items.
Assigning using Rows
Every object has measurement values, displayed under properties in the right-hand panel of the calculation view, organised by object type.
Based on these, you create a row on the object and fill in the columns to describe what the quantity refers to. In the "Quantity" field, you then enter the corresponding variable from the measurement values list to link the measured data to the quantity item.
Read more under the topic Rows.
Assigning information at the object level
Describing quantities at the object level works well for simple takeoff setups — particularly when you are working with only a few quantity types, and none of the marked objects share information with other quantities.
To do this, describe the quantity takeoff in the Name field of the object. You can also make use of the "Number/Tag" field for product codes or equivalent references.
.png)
Compile and Subtotal
A well-structured folder hierarchy in the estimate tree means each folder automatically acts as a subtotal. Select a folder to instantly sum everything beneath it — including all subfolders — giving you a total for that level and everything below it. This lets you quickly pull figures for entire building blocks, floors, or apartments.
You can also select multiple folders at the same level to combine their totals.
Geometra always sums what is selected. This applies to individual objects too — selecting several objects directly gives you the combined total of your selection.
.svg)