

.webp)
Guide: From Bluebeam till Geometra
If you want to test converting your Bluebeam Revu projects to Geometra, we recommend you take advantage of our 30-day free trial. Feel free to contact our support if you feel unsure about anything. We are here to help you.
When switching from Bluebeam, you can use your new Geometra-license for free, until your Bluebeam-license expires. (When shown a proof of contract termination) Please contact our support to claim offer.
Here's a step-by-step guide on how to switch from Bluebeam Revu to Geometra:
%20(7).webp)
Create a Geometra-license
Get started by setting up a Geometra license. You can order your license here: https://www.rukkor.com/geometra/pricing. You decide which license type you want and can choose between an annual or monthly license. You can also take advantage of our 30-day free trial period.Once you have access to the username and password for your license, log in to Geometra. From the program's front page, press the + sign to create a new project and give it a name.
Upload files
In the next step, upload your BlueBeam files or files without previously marked objects to Drive. When uploading a file with selected objects created in BlueBeam Revu to Geometra, select the Files and Objects upload option in the green box that appears on the screen. You can also upload documents, descriptions, and images belonging to the project to Drive. That way, you collect all the project documentation in one place. Suppose you have several drawings in the same file. In that case, we recommend splitting them up since that lets you see exactly which drawing an object is on instead of just referencing a file containing multiple drawings when you export the rows to Excel.
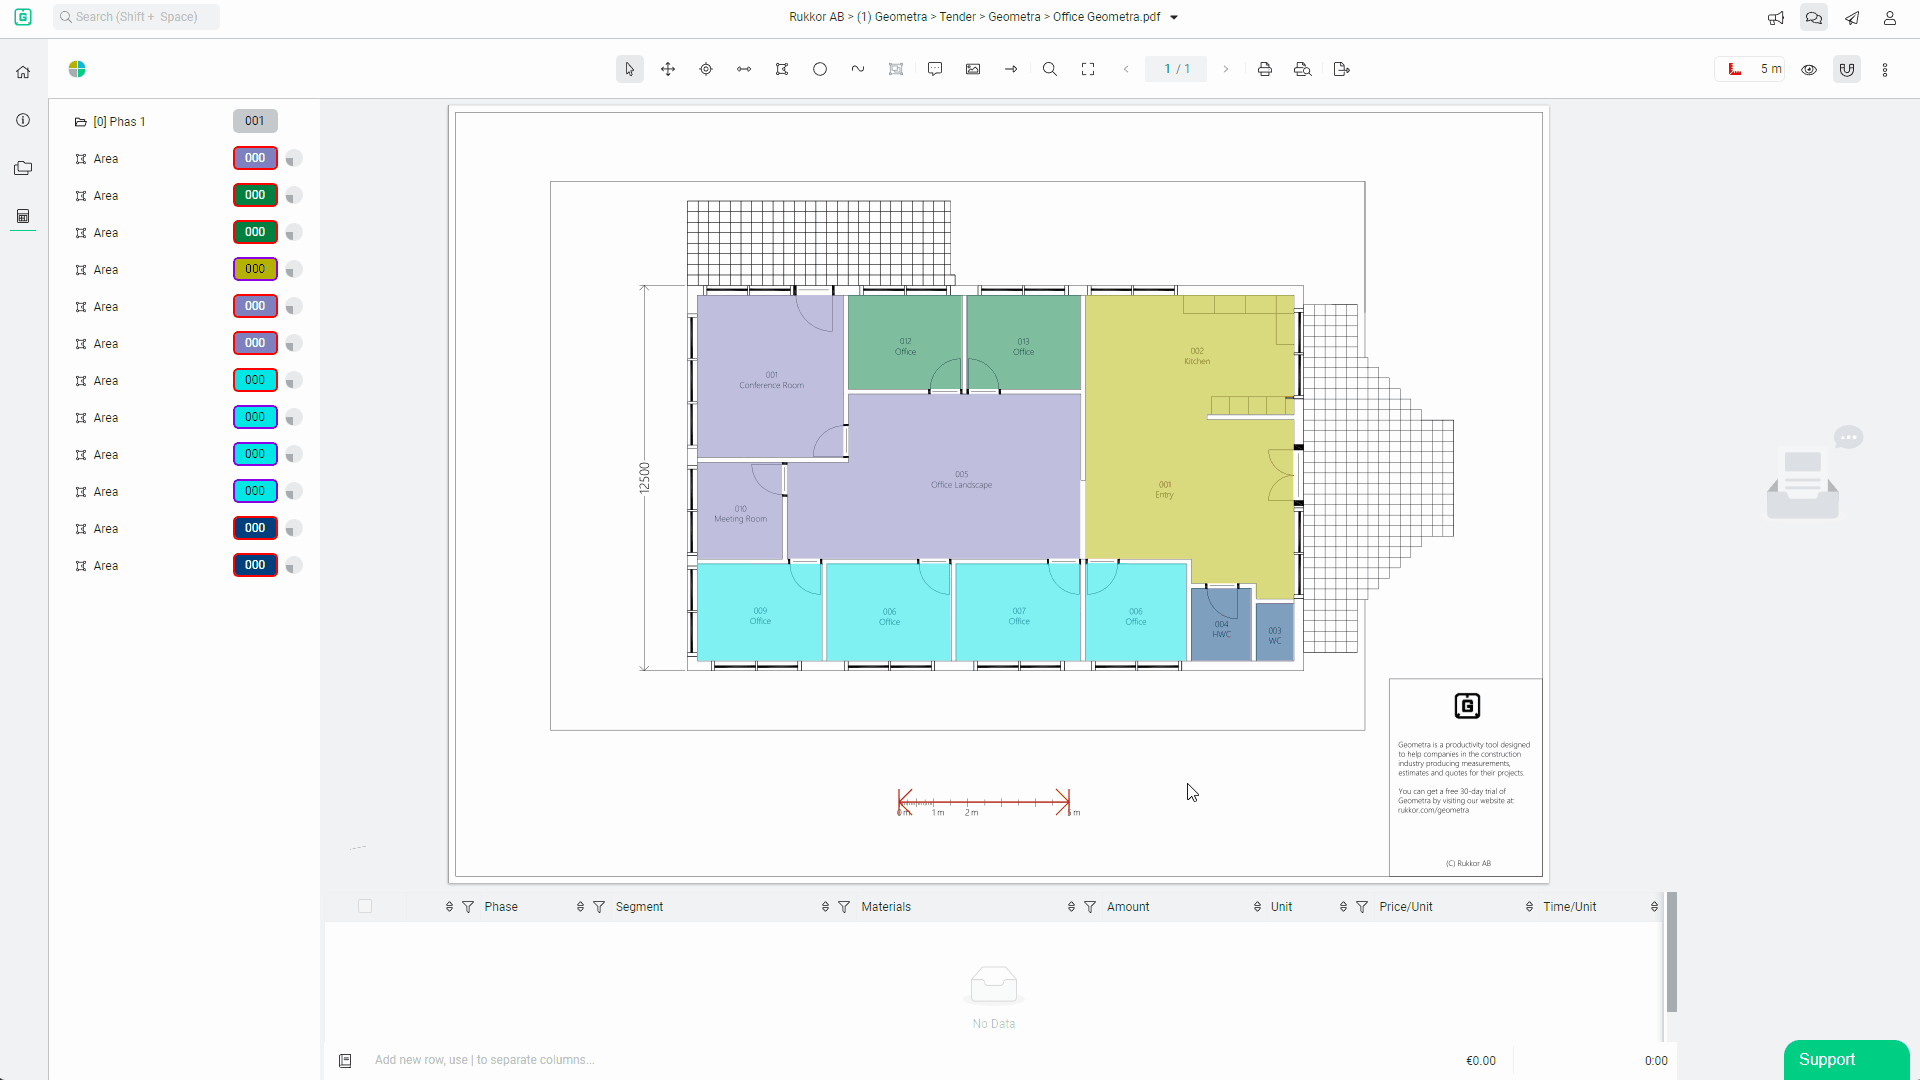
Enter reference measurements
Once you have uploaded the files you need to the project, click on one of them and calibrate each by setting a reference measurement based on a known measurement from the drawing. Check that the reference measurement is correct by measuring a known length on the drawing.When you enter reference measurements, the objects on the file will appear on the left side of the program in what we call the estimation tree. You now get a lineup that starts with markings and comments. Following that, you get area, lengths, polylengths, etc. When you click on an object in the estimation tree, the program shows where the object is located on the drawing. Since Geometra doesn't use the same type of comments as BlueBeam Revu, markers may not be displayed in Geometra. If you wish, you can remove these by selecting and right-clicking on the object in the tree and selecting Delete.

Get started with your project in Geometra
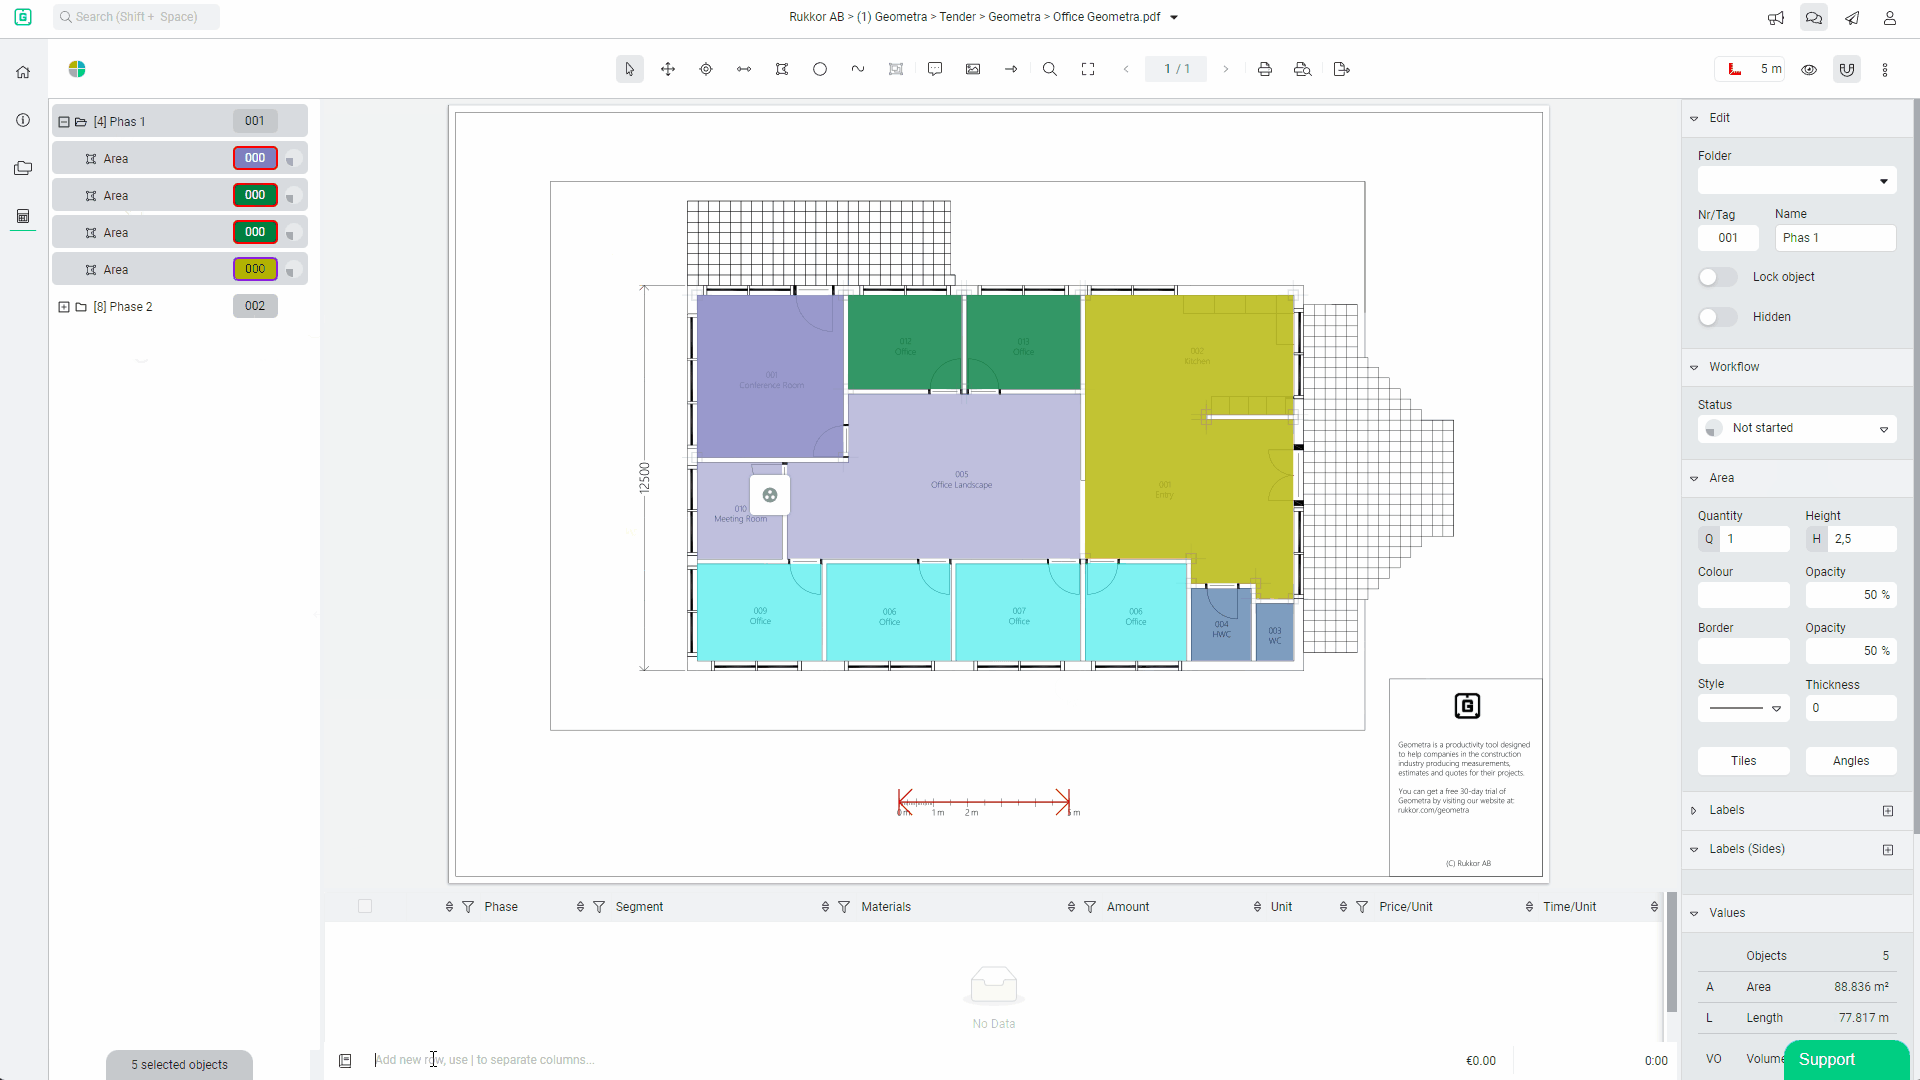
Now that you've gone through the three steps above, it's time to structure your project. You do this by first creating a folder structure in the estimation tree, consisting of main folders and subfolders if you wish. Place your objects in a folder of your choice. You can also give each object a name to increase traceability throughout the project.
You are now ready to start working!
Create folder structure
To structure your project, you can easily create a structure with folders in the estimation tree, where you collect objects from the drawings. Sorting can be done by project stages, internal wall types, and other criteria. These are just a couple of examples. You can also create subfolders within the main folder with a single keystroke. When you select a folder or subfolder in the estimation tree, the combined values for all the objects in the folder are displayed.
Use the rows
Once you have created a folder structure for your objects, connecting one or more objects in a folder to a row is easy. You do this by marking the objects you want to disconnect from the estimation tree. You then enter which part of the building it is about at the bottom of the app before pressing Enter. A basic structure is then displayed for the row. Inside the row, you enter information about Construction part/Work/Material/Quantity/Price per unit/Time per unit. When retrieving the value for a quantity, enter the code that appears in front of the measurement value you want to connect to the row. (E.g. "A" for gross area, "v1" to indicate a specific wall area of an object). You can save each row in a row library so they can be reused to estimate new objects. You do this by selecting the row, right-clicking, and selecting Save.
Duplicate a project
When you have completed your tender in Geometra, you can duplicate it and give it a new name - like "Production estimate." Use the production estimate as you work and throughout the project's life cycle. Now you can add changes, supplement with additional drawings and documents, make changes to rows and add changes and additions. All changes happen in real-time and are visible to anyone with access to the project, whether they have a Creator or Viewer version of Geometra.
Contact Geometra's support
By contacting us for support via the built-in chat in the program, you can get direct answers to your questions and quick feedback. Support is free, even with a 30-day trial license, so feel free to use it. You can also order a demo from support to get tips and help on how to get the most out of Geometra for your project. We are here to help you.
support@rukkor.com
0411- 23 66 90
.svg)